by Tess Lojacono
“You can make anything talk!” I remember when my best friend Aubrey, first said those magic words to me. And my whole world just about exploded!
Ever since I had discovered the concept of Social Robotics, I was determined to build my own robot. I spent hours, days, creating all different kinds of robot bodies from all different kinds of things: cardboard BoxBots, soft, fluffy StuffyBots, squishy FoamBots and collaged FeltBots. My imagination was ripe with ideas for what I wanted my robots to look like, but what did I want them to do?
In all of my experience using social robots to teach art, play games, recite poetry and generally be companions, I realized the successful social robot had have two things: 1) it must have a face and 2) it had to be able to communicate verbally.
And now I knew how to do this. All it takes is a blue tooth speaker (see pictured below) and a phone or tablet or whatever device you like, to control your robot!
 (These are two examples of speakers I’ve used in small BOXbots.)
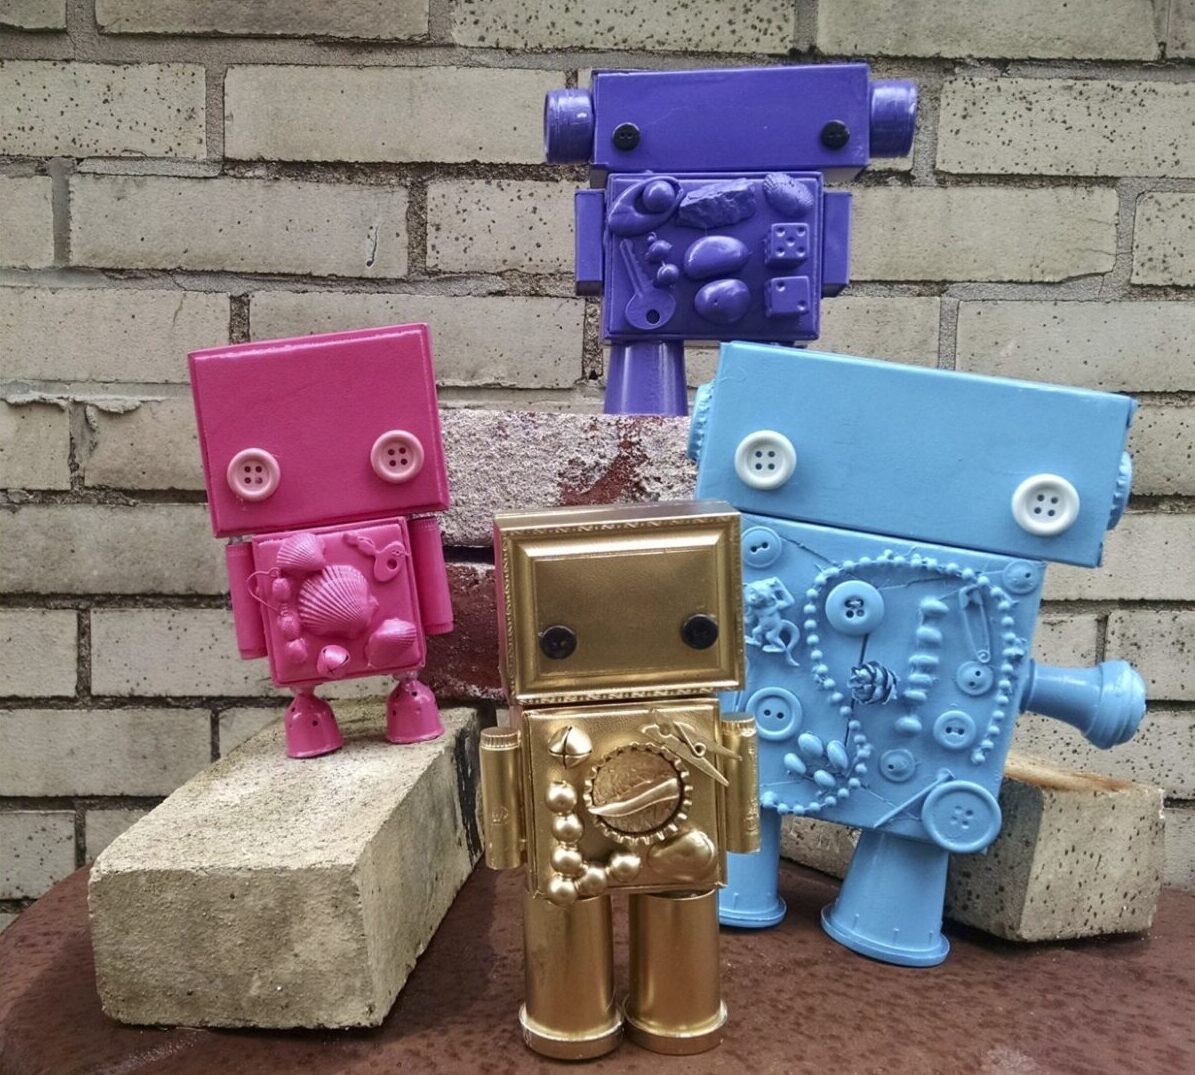
But first you need to make a robot body. Let’s look at BOXbots:
 (These were made by kids at a Bufflalo MakerFaire that FAM participated in, a few years ago.)
Next, collect what your materials and tools:
• Boxes
• Hot glue gun with glue sticks
• Spray paint• Lots and lots of junk — buttons, shells, caps, lids, puzzle pieces, nuts and bolts, pieces of chain, old jewelry, old keys, you get the idea.
Try using a box for the body that has a lid; you can easily make a chamber for a small blue tooth speaker with this. Like so:


Balance is important too, so make sure whatever you use for legs (pill vials used here but I have used spools, small bottles, etc.) will support the robot’s body and make sure to place them where they will balance before gluing.
When you have identified body, head, legs and arms, lay the robot pieces flat and decide what junk you will add to decorate or to pose as power gizmos.
Once that is done, use your glue gun (kids should have an adult supervise this) and carefully glue all pieces to your bot’s front. I like my robot’s eyes to stand out, so I don’t glue those on until after I’ve applied the spraypaint.
When the paint is dry, you can turn your bot over and glue a few things on the back. Be careful not to make the back too heavy or your robot will have a hard time standing up.
When all the gluing is completed (except maybe the eyes), you are ready to spray paint. I do this outdoors with a drop cloth protecting the gras and NOTHING around that could accidentally get sprayed!!
Paint the front and let it dry for way longer than you want to (like a hour or two). Then carefully turn your bot over and spraypaint the back. Again, be patient as it dries.
Finally, carefully check to see if you need a second (or third) coat of spray paint or just some touch-ups.
When the robot is completely painted and you are satisfied with it, glue on the eyes.
Now you have the body!! Awesome!! The last part is super easy.Find a Text to Speech app that has the voice you’re looking for. Test them out—some are free and some come with a price. (Personally I like “Tell Me” which you can get for free in the Google Play Store.) When you find one you like, you’ll have to load it on the device you’re using to control your robot’s speech and type something for your robot to say. Have fun with it! Your robot can tell jokes, recite poetry or tell a story. Or just make small talk—whatever you’d like to hear.
Then turn on your speaker and connect it to your device using bluetooth. Insert the speaker into your robot.
And when you make your Text to Speech app speak, it will sound like it’s coming from your robot! Make sure to save your “palettes” of speech so you can use them whenever you like! Have fun!
